Chainmaker Configuration
In this chapter, you will learn how to configure and use ChainMaker, including setting up storage providers and other operations, to help you quickly get started and apply the features of the ChainMaker platform.
Next, we will use "Deploying ChainMaker via the Management Console" as an example for our introduction. If you have not yet deployed ChainMaker, please follow the ChainMaker documentation for deployment.
Configure Chain Information
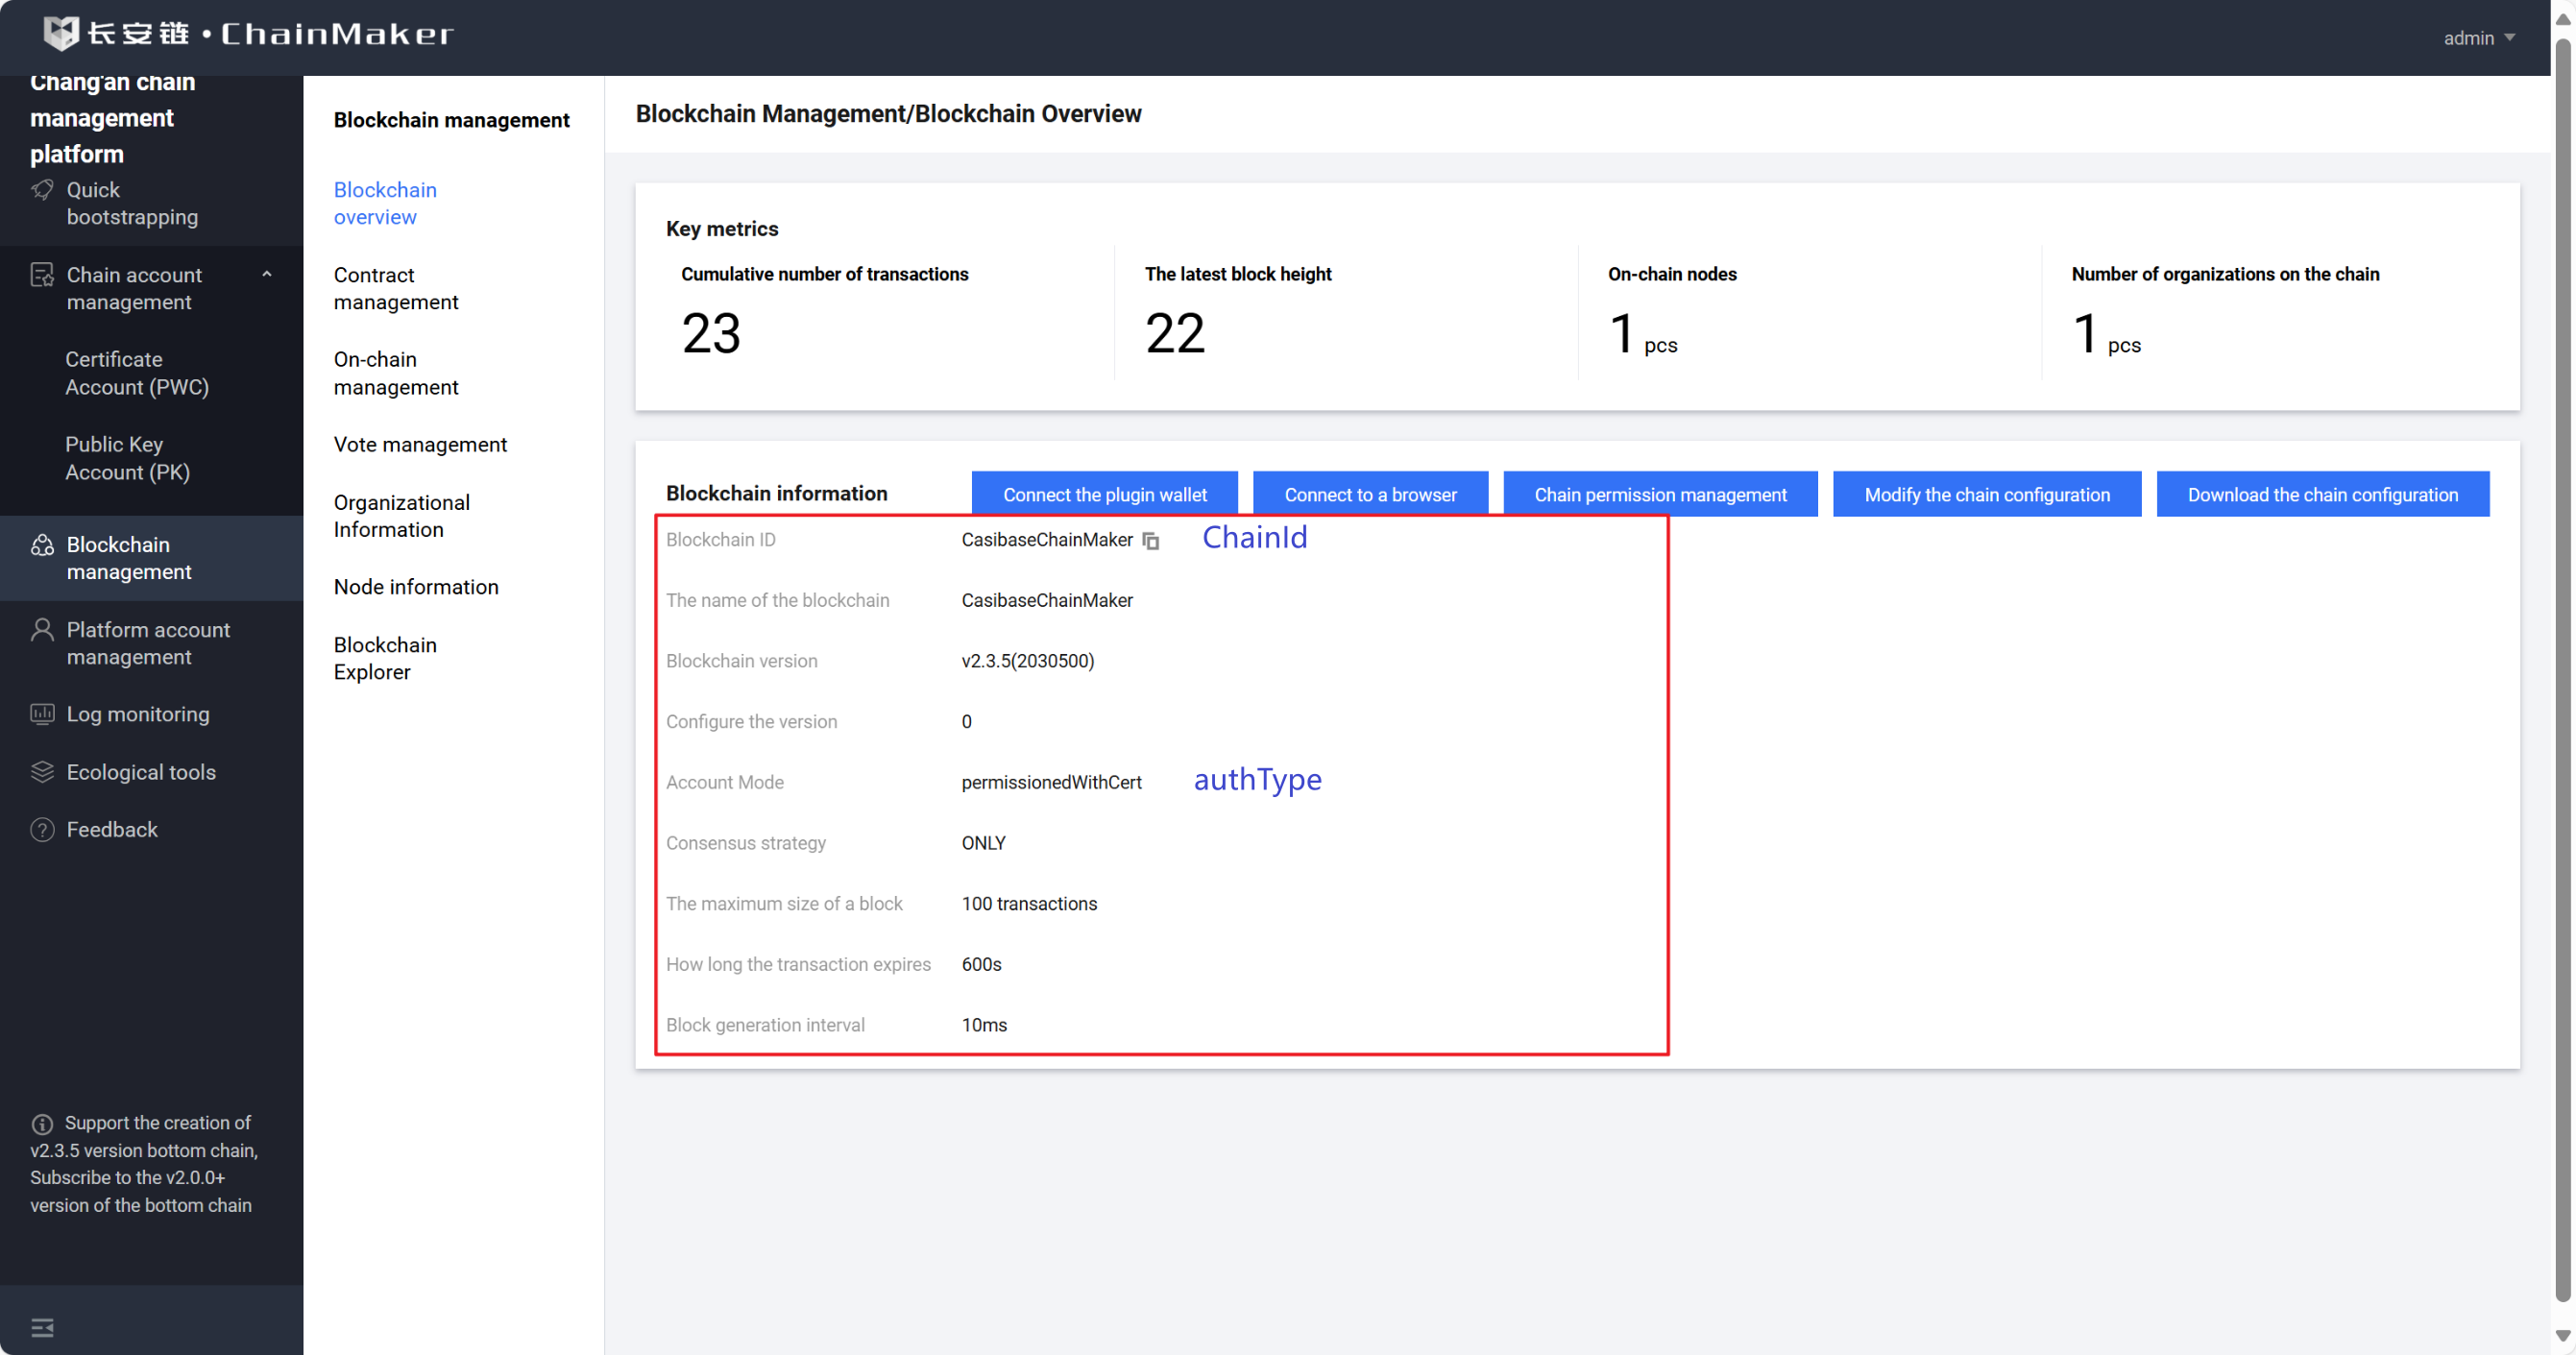
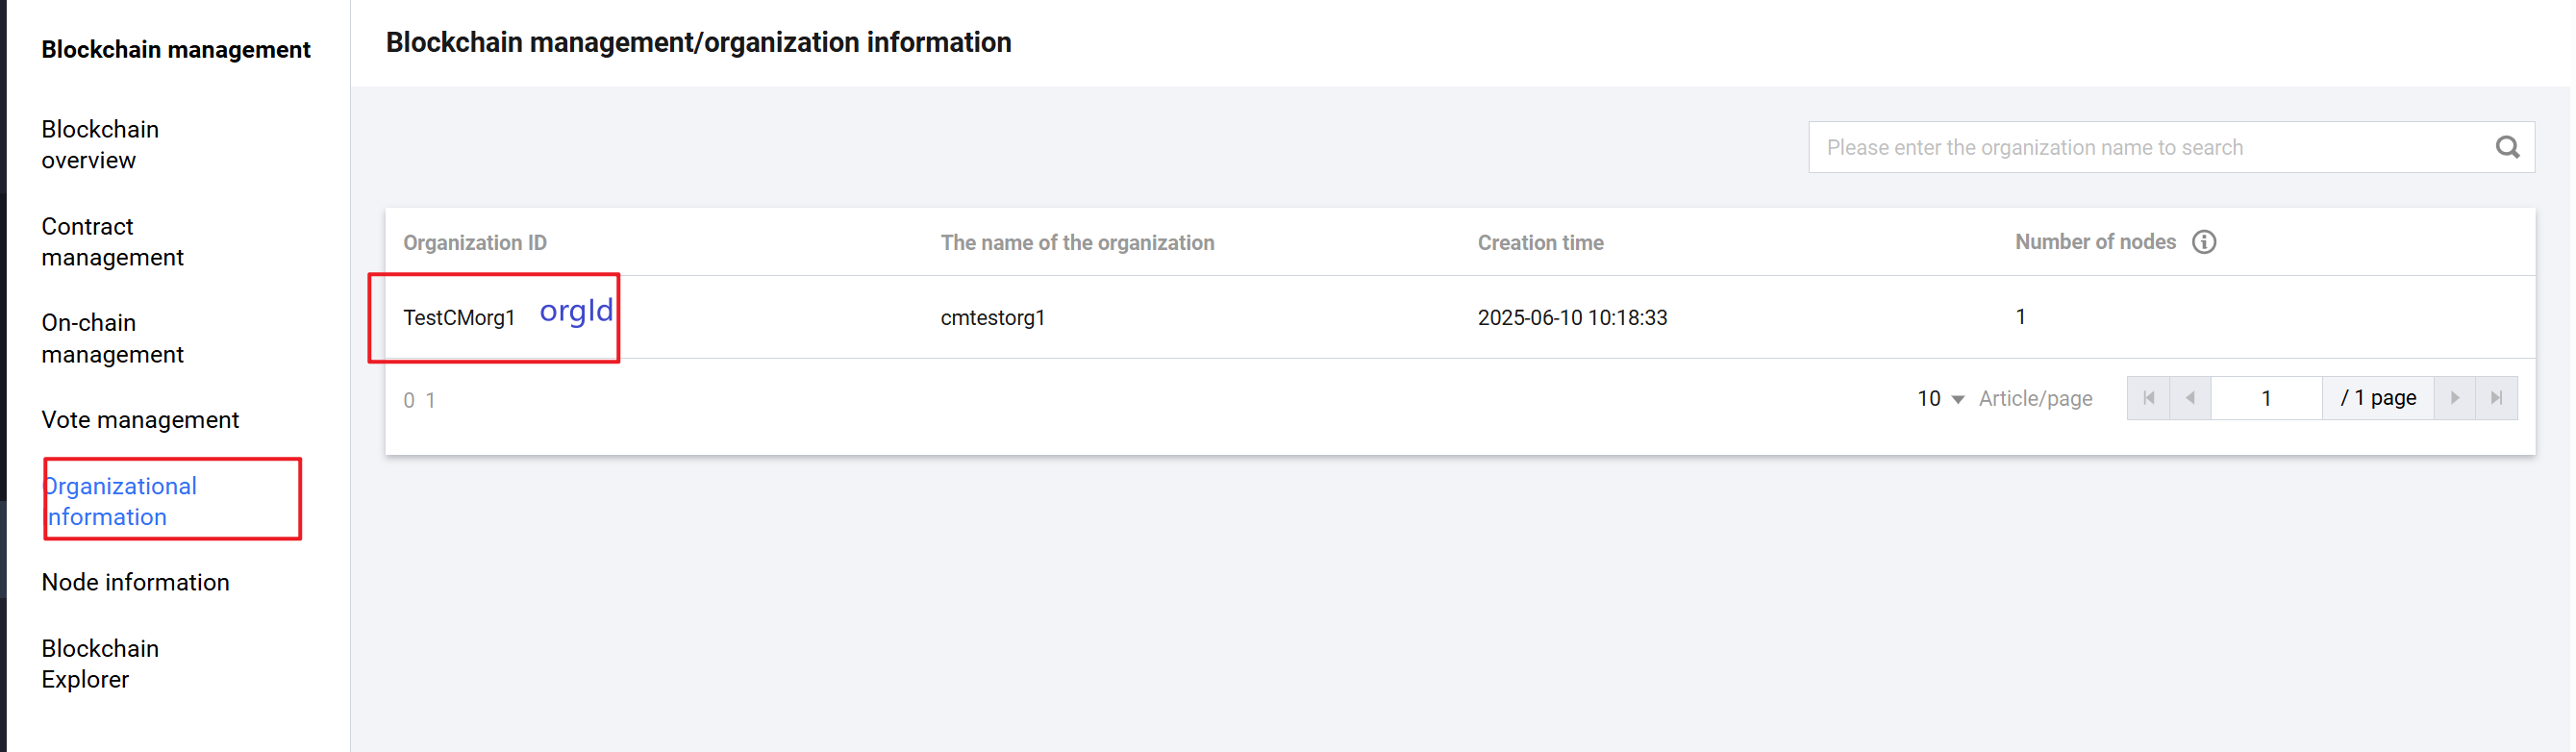
1.1 chainId, orgId and authType configuration
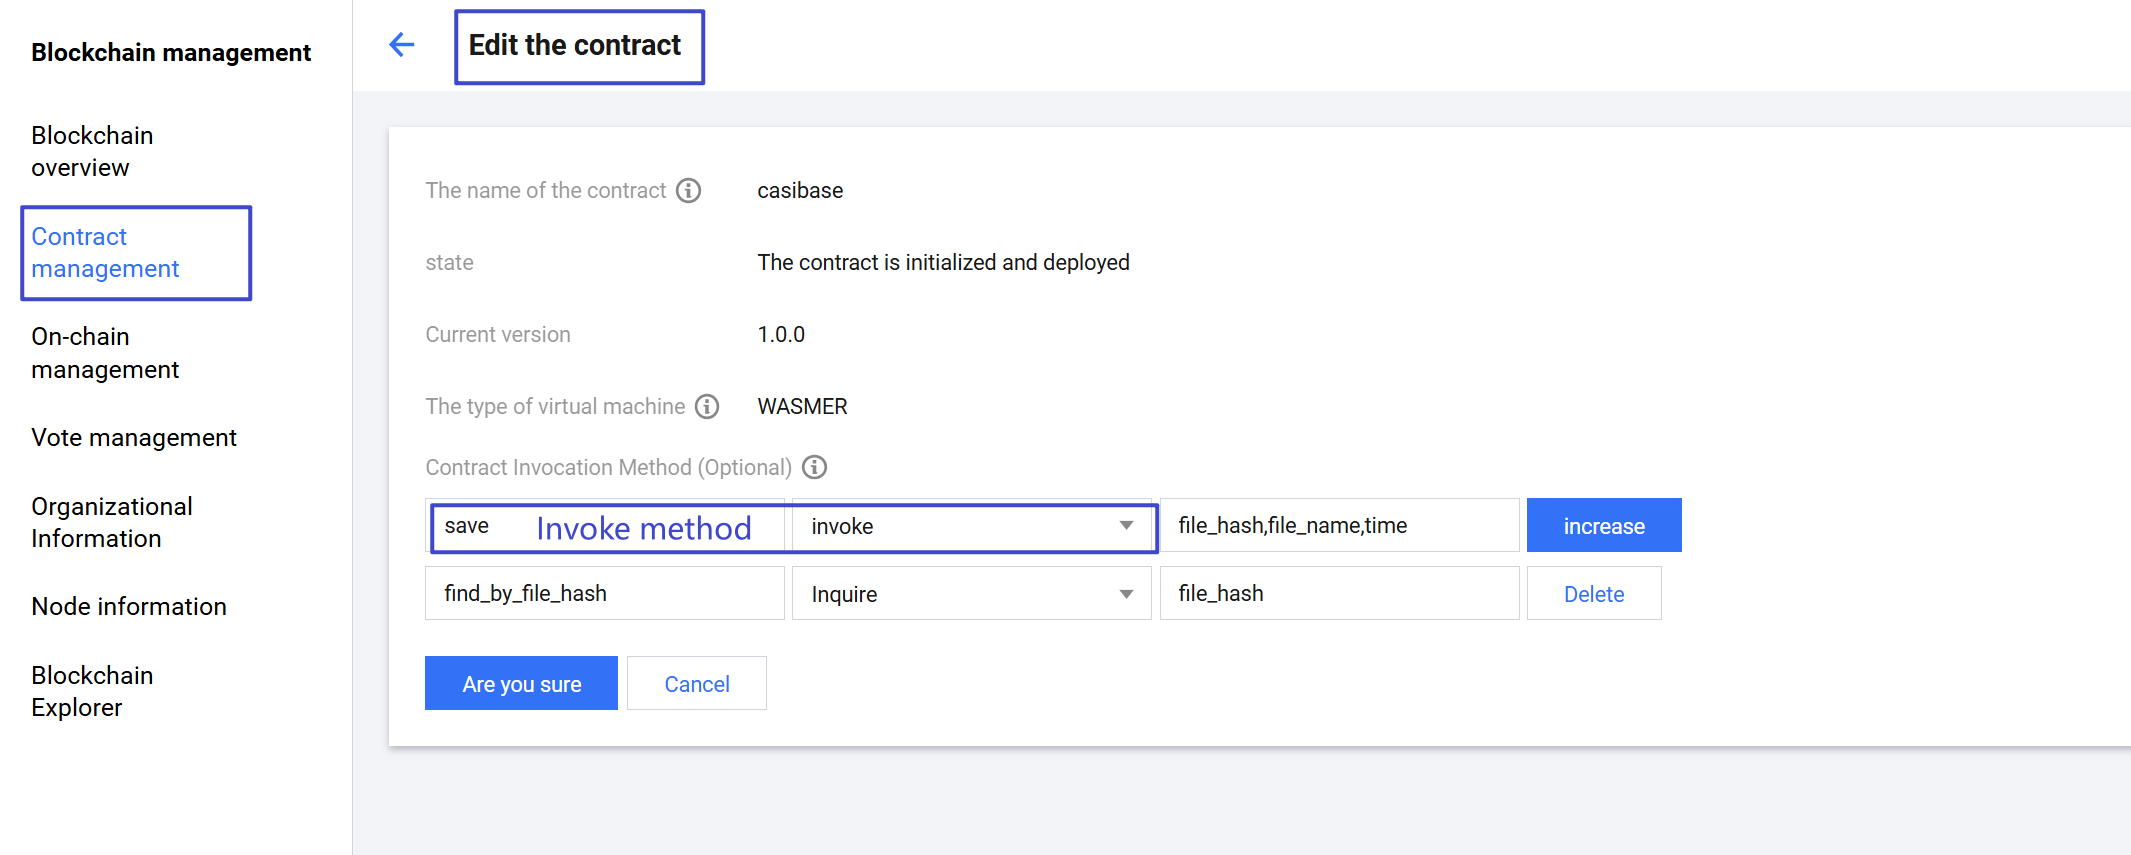
1.2 Contract name and Invoke method configuration
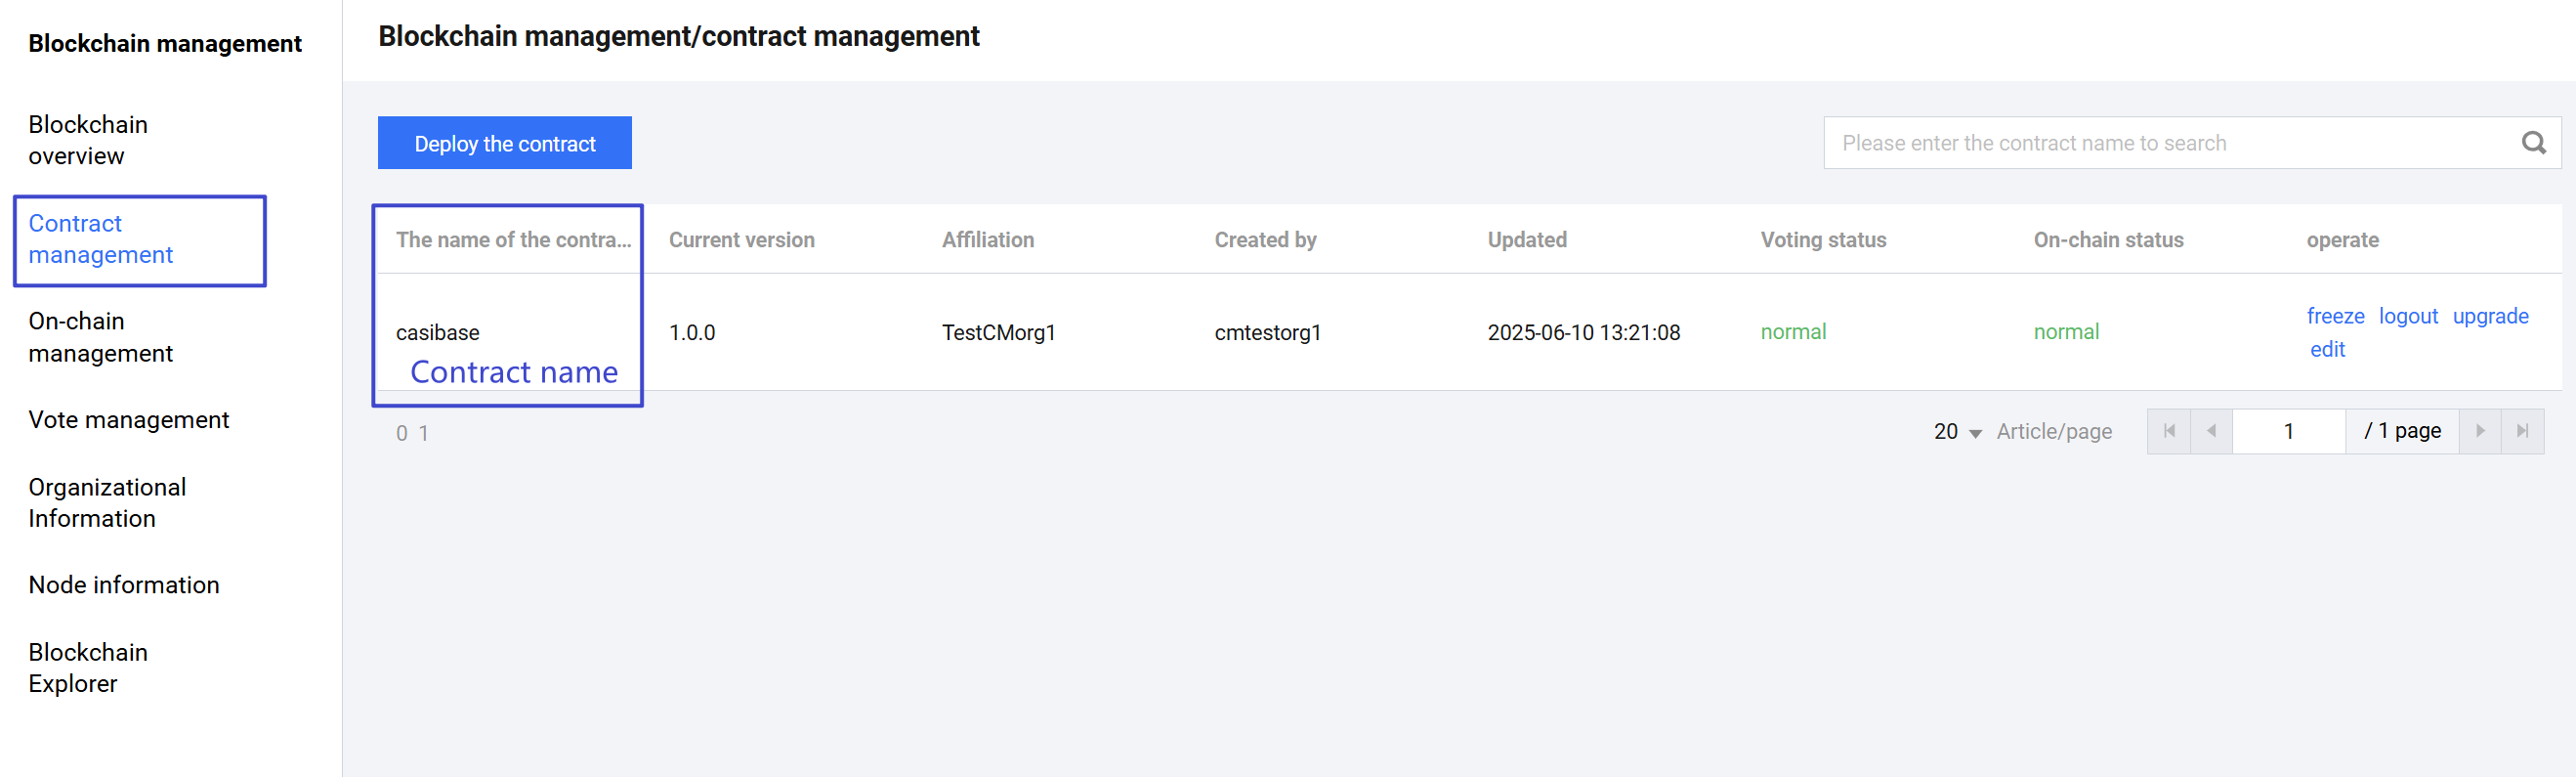
Click the edit button in the "operate" column:
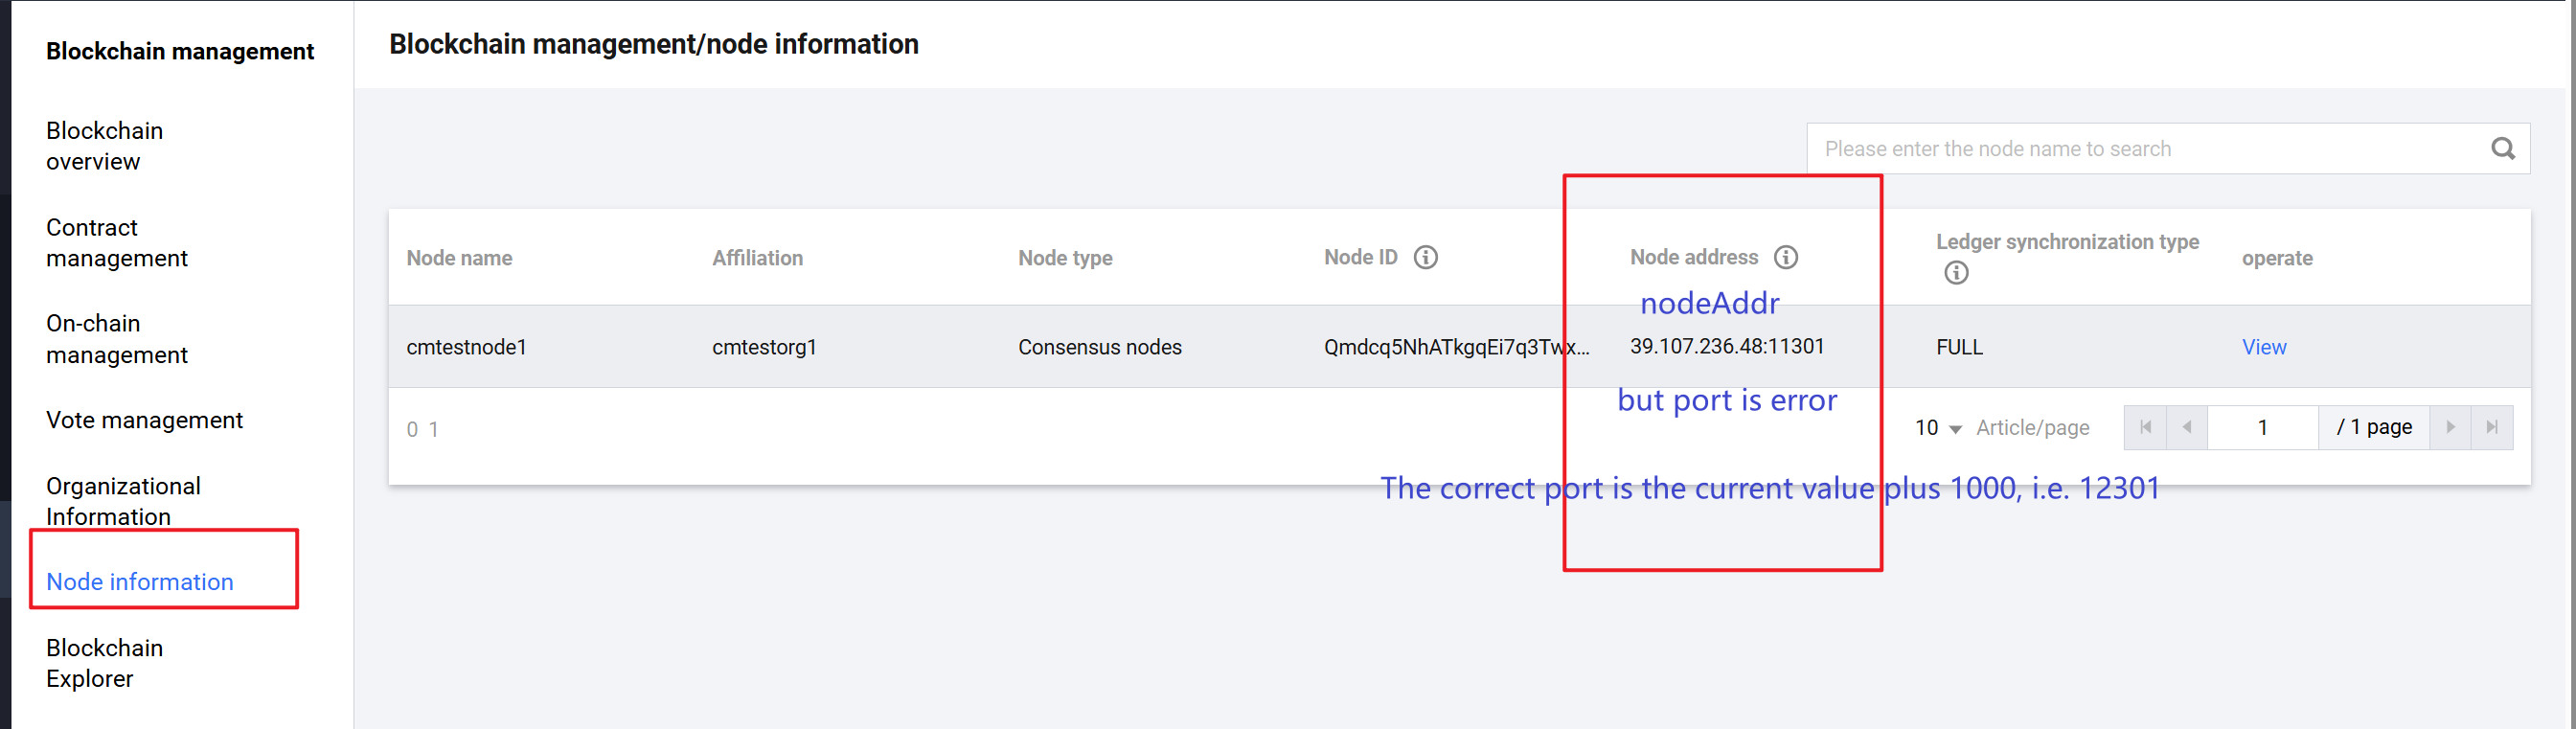
1.3 key, certificate, and nodeAddr configuration
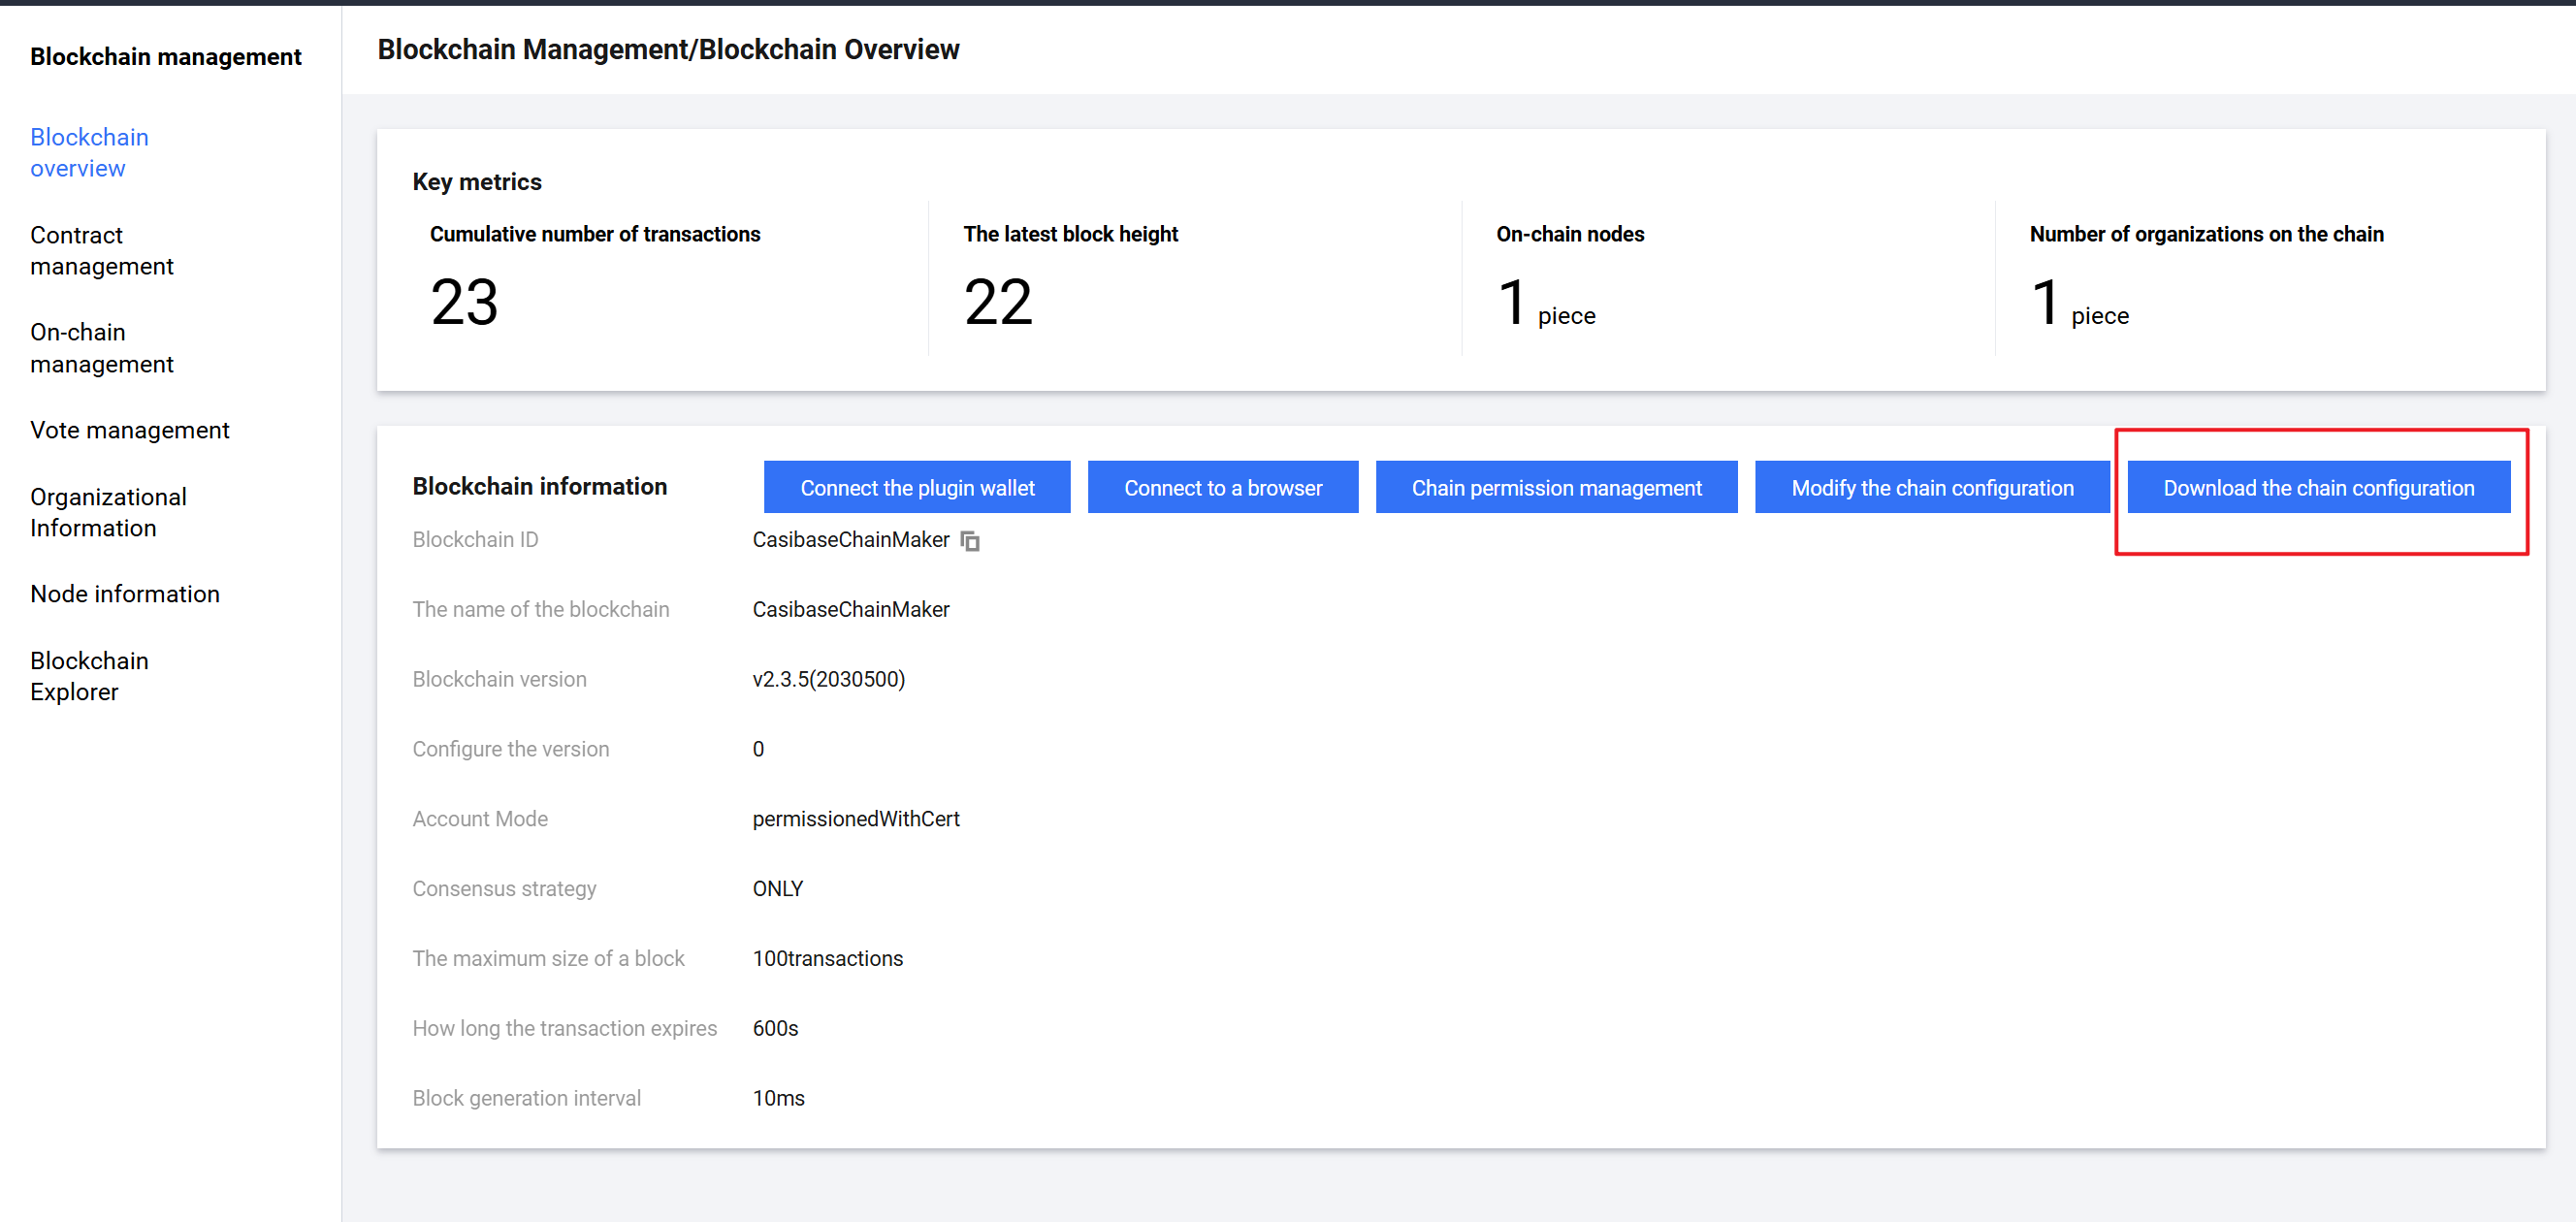
Click the "download the chain configuration" button and extract the archive:
1.3.1 You can find the node_addr configuration in ~\CasibaseChainMaker\sdk_configs\sdk_config.yml.
Alternatively, you can check nodeAddr elsewhere, but note that the displayed port is the p2p port. The one we use should be the rpc port, which is the p2p port + 1000 by default.
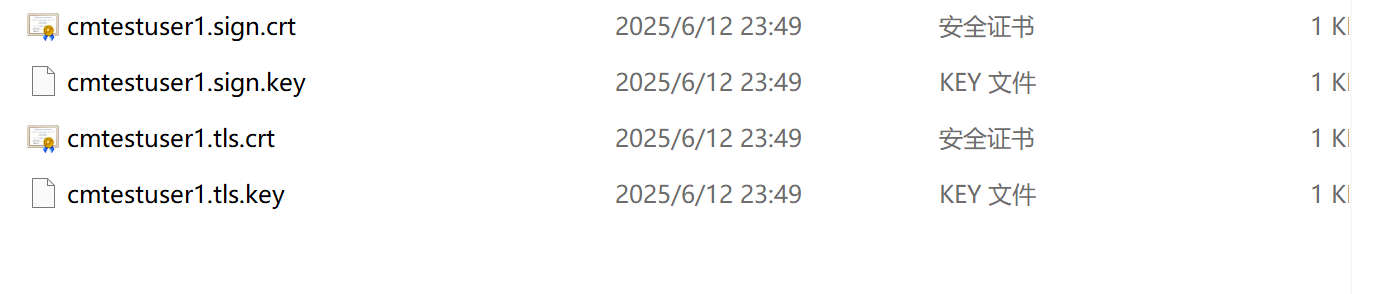
1.3.2 You can find the corresponding user certificate and key in ~\CasibaseChainMaker\sdk_configs\crypto-config\TestCMorg1\user\cmtestuser1. Fill in the provider fields accordingly.
1.4 Browser URL and ChainMaker endpoint
The Browser URL refers to the URL of the ChainMaker management console, which allows for quick access from Casibase in the future:

The ChainMaker endpoint refers to the IP and port of the ChainMaker server that Casibase needs to connect to, for example: 127.0.0.1:13900